
Managing a music website or a download portal on platforms like Wapkiz and Wapaxo requires attention to detail. An MP3 file with the correct information—such as the artist's name, song title, and album art—not only looks more professional but also dramatically improves the user experience.
Fortunately, Wapkiz offers built-in tools to do just that. In this guide, we'll walk you through how to edit the metadata of your MP3 audio files directly on the platform and how to display that information neatly on your site.
What is MP3 Metadata (ID3 Tags)?
Before we start, it's helpful to know what we're editing. Information like the artist, album, year, genre, and the song's cover art are called "metadata" or "ID3 tags." They are stored within the MP3 file itself and are read by music players and, of course, by the Wapkiz platform.
Method 1: Editing the MP3 Directly on Wapkiz
This is the most direct way to add information after uploading the file.
Step 1: Upload Your MP3 File
Start by uploading your audio file in MP3 format to the File Manager of your Wapkiz site.
Step 2: Access the Edit Option
After the upload is complete, locate the file in your list and click the "Edit Mp3" link associated with it.

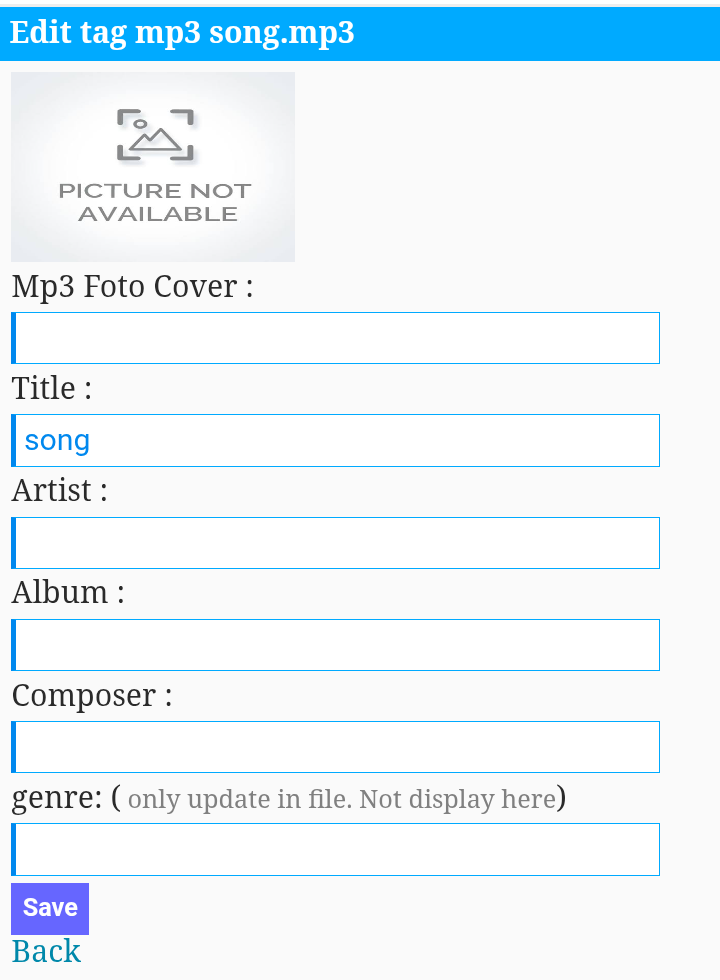
Step 3: Fill in the Music Information
You will be redirected to a page where'' you can fill in the audio details. The available fields are:
- Cover url: Insert the direct link (URL) for the image that will be the song's cover art.
- Title: The name of the song.
- Artist: The name of the singer or band.
- Album: The album the song belongs to.
- Composer: The name of the song's composer.
- Genre: The musical style (e.g., Pop, Rock, Hip-Hop). Note: This information is saved within the audio file but is not displayed by default in the file manager.
You will also see some information that is not editable, as it is extracted directly from the file:
- Bitrate: The quality of the audio.
- Year: The release year.
- Duration: The total length of the song.
After filling everything in, save the changes.
How to Display the Information on Your Site (FM Codes)
Now that the data is saved, you need a code to show it to your visitors. For this, we will use the File Manager tags (FM tags).
In the section of your site where'' you want the music list to appear, insert the following code:
[fm]o=u, l=100|| <div class="music-item"> <img src="%music-thmb%" alt="Album Cover" width="80"> <div class="music-details"> <strong>Title:</strong> %title%<br> <strong>Artist:</strong> %music-artist%<br> <strong>Album:</strong> %music-album%<br> <strong>Composer:</strong> %music-composite%<br> <strong>Duration:</strong> %music-duration%<br> <strong>Quality:</strong> %music-bitrate%kbps<br> <strong>Year:</strong> %music-year%<br> <strong>Downloads/Plays:</strong> %*hits%<br> </div> </div> [/fm]
Explaining the code:
- [fm]o=u, l=100|| ... [/fm]: This block instructs Wapkiz to list the files. o=u sorts them by upload date, and l=100 limits the list to the last 100 files.
- %music-thmb%: Displays the cover image you provided.
- %title%: Displays the song title.
- %music-artist%: Displays the artist's name.
- %music-album%: Displays the album name.
- %music-composite%: Displays the composer's name.
- %music-duration%: Displays the song's duration.
- %music-bitrate%: Displays the quality (bitrate).
- %music-year%: Displays the year.
- %*hits%: Displays the number of times the file has been downloaded or played.
You can customize the HTML inside the code to match your site's design.
Method 2: Editing the MP3 Before Uploading
If you handle a large volume of music, editing them one by one on the platform can be time-consuming. A more efficient alter--native is to edit the MP3 file's metadata directly on your computer or phone before you upload it.
By doing this, Wapkiz will automatically read the information already embedded in the file, saving you the work of manual editing on the platform.
Recommended Tools:
- For PC (Windows/Mac/Linux):
- MP3tag: One of the most popular and powerful tag editors. It's free and easy to use.
- MusicBrainz Picard: Excellent for automatically organizing and tagging large music collections.
- For Android:
- Search the Play Store for "MP3 Tag Editor" or "Music Tag Editor." There are several free and efficient apps, such as Star Music Tag Editor.
The process is simple: open the MP3 file in these applications, fill in the fields (artist, title, album, add the cover art, etc.), save the changes, and then upload the already completed file to Wapkiz.
Conclusion
Organizing your audio files is essential for creating a credible and easy-to-navigate music site. Whether you choose to edit directly on the Wapkiz platform or prepare the files beforehand on your device, you now have the tools and knowledge to present your music in the most professional way possible.
Start applying these tips and see the difference in the organization and appearance of your site!


.jpg)
0 Comments
Leave a Reply