Organizing your website or blog's content is essential for providing a good experience for your readers and for optimizing your site for search engines. One of the best ways to do this is by using categories.
In this complete guide, we will show you step-by-step how to create and manage categories for your posts on the Wapkiz and Wapaxo platforms.
What Are Categories and Why Are They Important?
Categories are, essentially, sections or topics that group posts about the same subject. Think of them like the different sections of a bookstore (Fiction, History, Cooking). For your site, they offer several advantages:
- Better Organization: Keeps your content structured and logical.
- Easier Navigation: Helps visitors easily find the articles on the topics that interest them most.
- Improves SEO (Search Engine Optimization): Helps search engines like Google understand the structure and main topics of your site.
The process is identical for both Wapkiz and Wapaxo. Let's get started!
Step-by-Step Guide to Creating a New Category
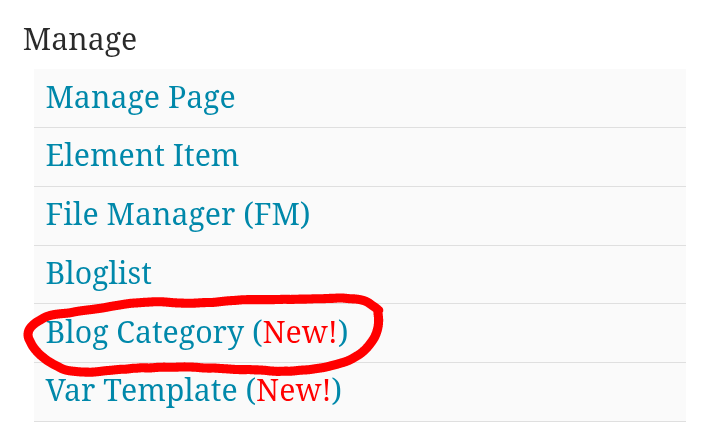
Step 1: Access the Category Panel
First, go to your Admin Panel. In the "Manage" section, find and click the link "Blog Category (New!)".
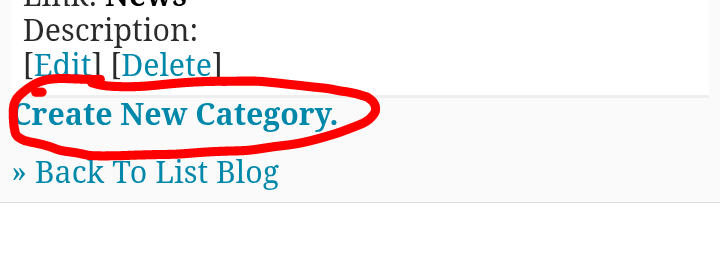
Step 2: Initiate Creation
On the page that opens, you will see a list of your existing categories (if any). To create a new one, click the link "Create New Category".
Step 3: Fill in the Category Details
You will now find a form that needs to be filled out with your new category's information.
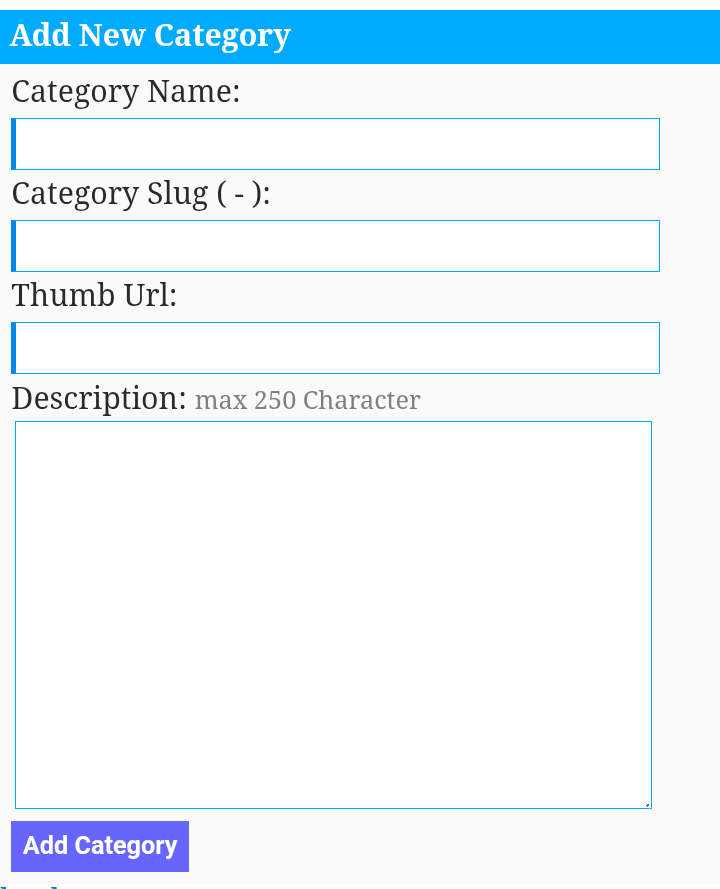
Let's understand each field:
- Category Name: This is the name of the category that will be visible to your readers. Choose a clear and concise name.
Example: Technology - Category Slug (-): This is the text that will appear in the URL (link) for your category. It should be in lowercase, and if it has more than one word, use a hyphen (-) to separate them. Do not use spaces or special characters.
Example: technology or for "Gaming Tips," the slug would be gaming-tips. - Thumb url: (Optional) Here you can insert the URL of an image that represents the category. Some themes use this image to illustrate the category pages.
Example: https://mysite.com/images/technology.jpg - Description: (Optional) Write a brief description of the posts that will be found in this category. This can be helpful for your visitors and for SEO.
Example: News, reviews, and tutorials about the world of technology, including smartphones, computers, and gadgets.
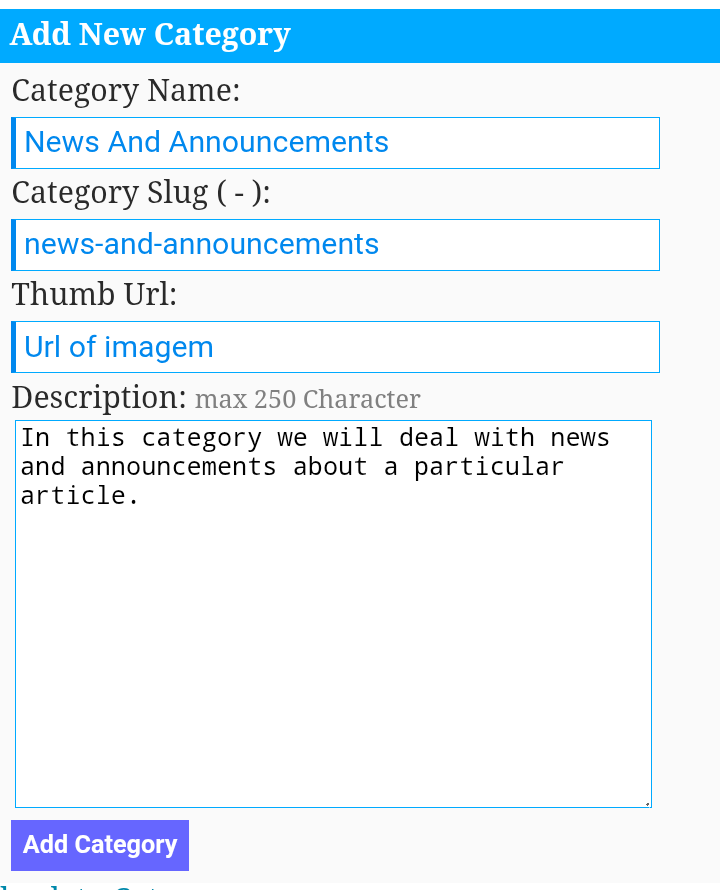
See the filled-out example below:
Step 4: Save the Category
After filling in all the desired fields, click the "Save" button at the bottom of the page. Your category will be created automatically and will appear on the list.
Editing or Deleting Categories
On the category management page (Manage -> Blog Category (New!)), you will see two options next to each created category:
- Edit: Allows you to change the name, slug, image, or description of an existing category.
- Delete: Permanently removes the category.
When you delete a category, all posts associated with it will also be permanently deleted! Be very careful when using this option.
Conclusion
Congratulations! You now know how to efficiently create and manage your content's categories in Wapkiz and Wapaxo. Using categories not only improves the look and usability of your site but also contributes to a solid foundation for its growth.

0 Comments
Leave a Reply