Congratulations! You've taken the first step and created your new site on the Wapkiz or Wapaxo platforms. This is an exciting moment, but it can also be a bit daunting. As you look at the dashboard, you're faced with a blank screen, a universe of possibilities. What's next?
Don't worry. Building a website is like building a house: you need a solid foundation before you start decorating. This guide will walk you through the three fundamental first steps to set up your site, transforming it from an empty page into a project ready for growth.
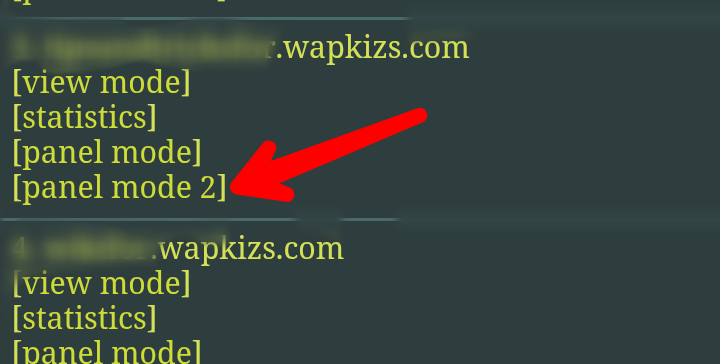
First, make sure you are in editing mode. After creating your site, click the [panel mode] or [panel mode 2] link to access the control panel.
Ready? Let's get started!
Step 1: Installing a Theme (The Face of Your Site)
Your newly created site is completely empty, like a blank canvas waiting for your touch. The first thing to do is give it a look, a visual structure. This is where'''' themes come in.
If you're just starting out and don't have experience with code, the easiest path is to use the pre-made themes provided by the platform itself.
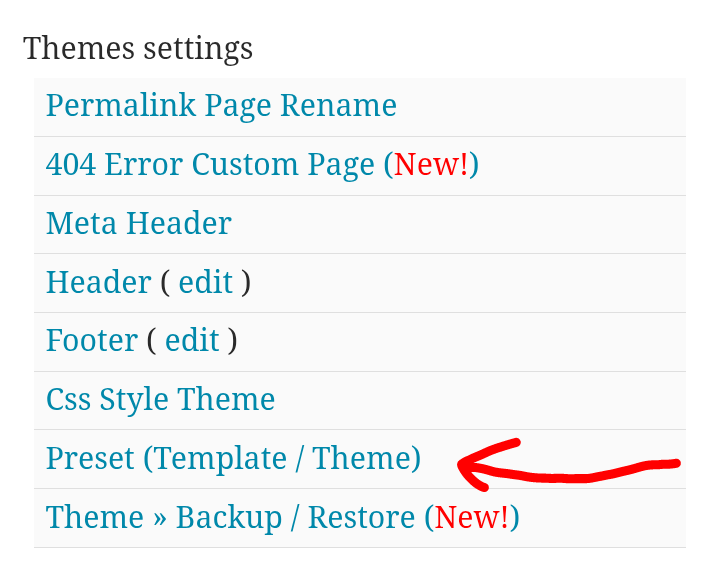
- In the panel, go to the Theme Settings section.
- Click on the Preset (Template / Theme) link.
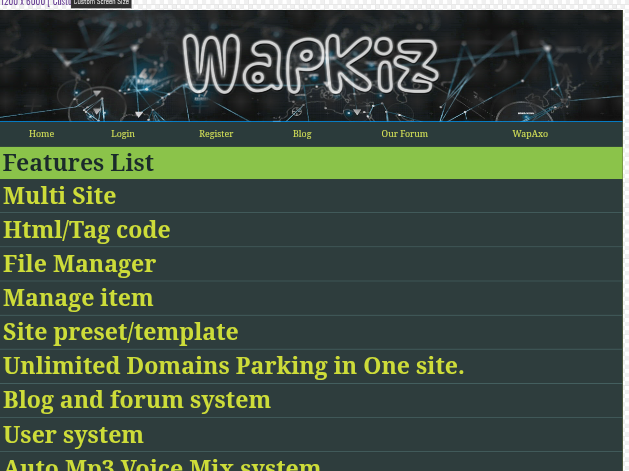
On the next page, you will find a small theme store. Currently, Wapkiz offers a few basic options, each with a specific purpose:
- Blog Theme: Perfect for those who want to create a personal or news blog.
- Download Site Theme: Ideal for file-sharing sites.
- Short URL Theme: For creating a URL shortener.
- COVID-19 Theme: A niche theme for information on the topic.
- Empty Theme: Useful if you want to erase everything and start from scratch.
Choose the theme that best suits your project and click to install it.
Want more options? Install themes manually!
If the default themes don't appeal to you, you can download and install themes from external sources. Sites like WapkizThemes.com offer a wide range of themes, both free and paid. A simple Google search for "Wapkiz themes" will also reveal many other options.
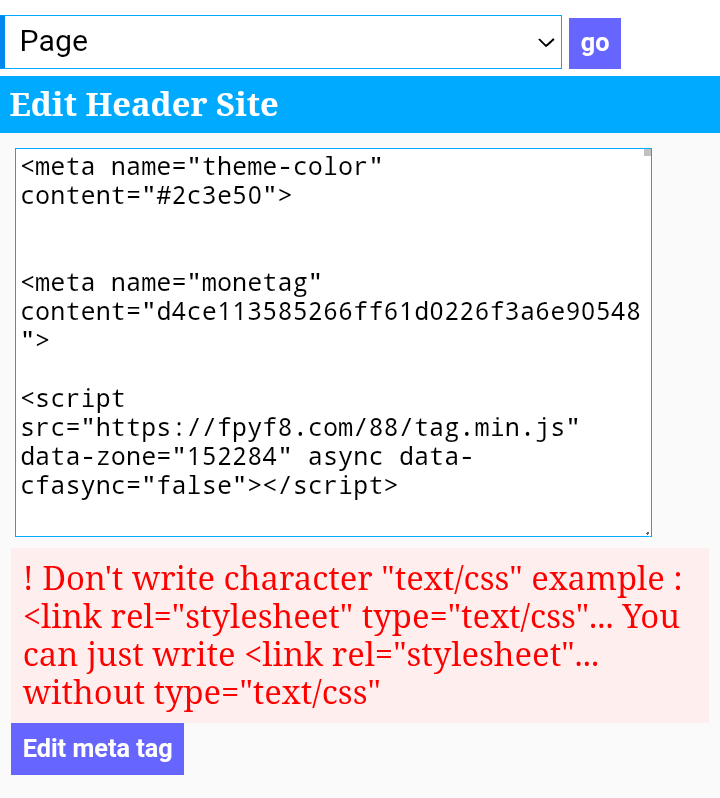
Step 2: Configuring the Header (The Brain of Your Site)
With the site's look established, the next step is to configure its "brain": the header (head). This is a part of the code that isn't visible to visitors but is extremely important for search engines (like Google) and browsers. This is where'''' you insert crucial information like meta tags, links to stylesheets, and other scripts.
Although most themes come with a default configuration, it is essential that you review and customize this area.
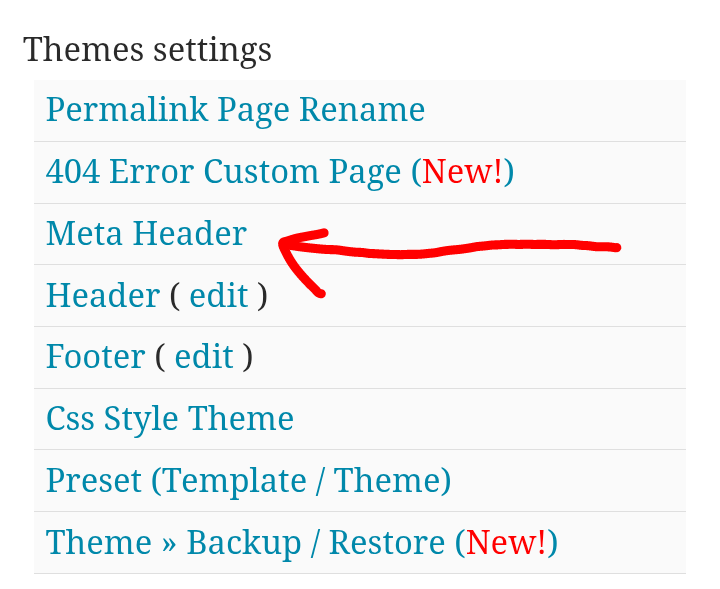
- Go back to the Theme Settings section.
- Find and click on Meta Header.
Here, you can edit the header code. Check that basic information, such as the description and keywords (meta tags), matches your site's content. This is vital for good SEO (Search Engine Optimization).
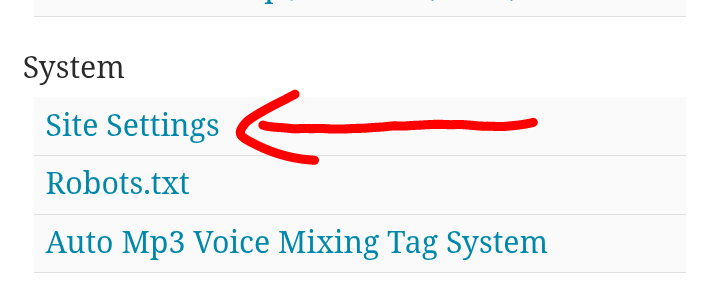
Step 3: Adjusting General Settings (The Identity of Your Site)
The last step in this initial setup is to fill in your site's identity information. Think of this as your project's "business card."
- In the side menu, go to the System section.
- Click on the Site settings link.
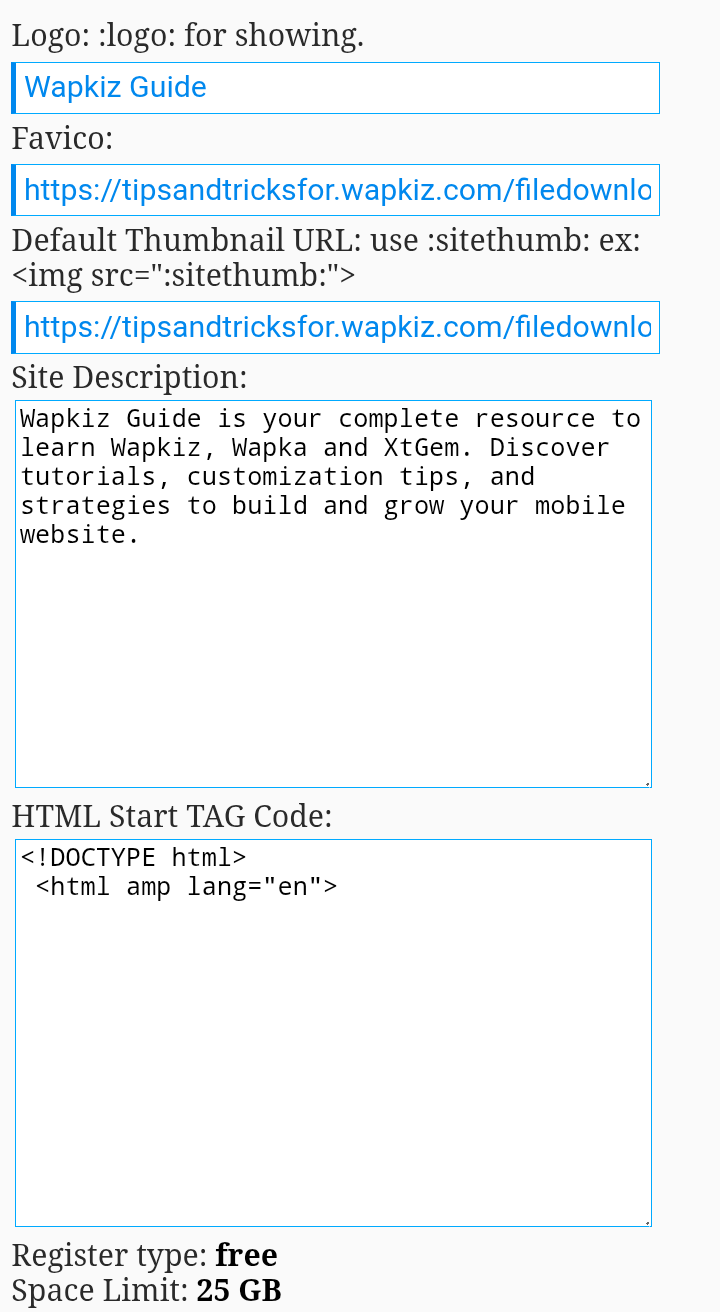
You will see a form with several fields. Fill them out carefully:
- Logo: Enter your site's logo. It can be simple text or the URL of an image.
- To display a text logo, use the code
:*logo:. - To display an image logo, use
<img src=":*logo:">.
- To display a text logo, use the code
- Favicon: This is the small icon that appears in the browser tab. Paste the URL of an image in
.icoformat to give your site a professional touch. - Site Thumb: The thumbnail image that will appear when your site is shared on social media. Enter the image URL and use
<img src=":*sitethumb:">to display it. - Site Description: A brief description of your site (maximum 160 characters). This is the sentence that usually appears under your site's title in Google search results, so make it count!
- HTML Start TAG Code: Defines the HTML version. For a modern site, it's recommended to use HTML5. Make sure the code starts with
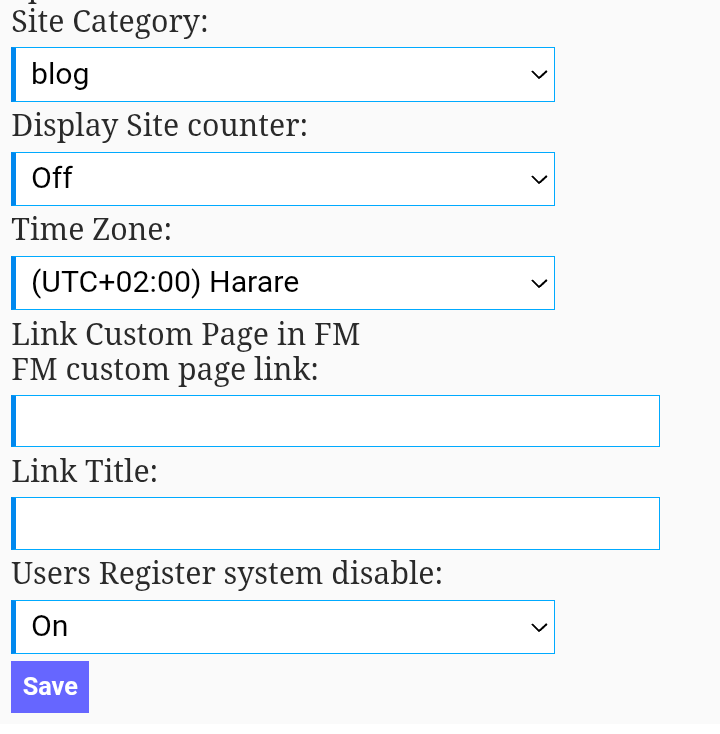
<!DOCTYPE html>and the html tag includes your site's language (e.g.,<html lang="en">). - Site Category: Select the category that best describes your site.
- Display Site counter: Enable this if you want to publicly display a visitor counter.
- Time Zone: Choose the correct time zone for your region or country.
- Users Register system disable: Check this option to prevent other users from creating accounts on your site. This is useful for sites that do not have a member area.
After filling everything out, click save. Please note: it may take up to 10 minutes for all changes to be applied and become visible on your site.
Next Steps
And you're all set! With these three steps, you've built the foundation of your website. It now has a look, an identity, and is properly configured for search engines.
From here, the real fun begins. Now you can focus on the content: start writing blog posts, uploading files, creating pages, and further customizing the code to make the site truly your own.
Get to building, and best of luck with your project! If you have any questions, leave a comment below.

0 Comments
Leave a Reply